
Cheesy Garlic Chicken Wraps: Ooey-Gooey Deliciousness! 🧄🧀🌯
1. Introduction
Welcome to your new favorite easy chicken wrap recipe! These cheesy garlic chicken wraps are packed with juicy, seasoned chicken, melted cheese, and aromatic garlic, all wrapped in a soft tortilla. Perfect for quick weeknight dinners or satisfying snacks, this ooey-gooey chicken wraps combines bold flavors with a simple preparation that anyone can master. Whether you’re a beginner or a seasoned home cook, this recipe will become a staple in your meal rotation.
2. Ingredients for Cheesy Garlic Chicken Wraps
- 2 boneless, skinless chicken breasts
- 1 cup shredded cheddar or mozzarella cheese
- 4 large flour tortillas
- 3 cloves garlic, minced
- 2 tbsp olive oil
- 1 tsp paprika
- 1 tsp Italian seasoning
- Salt and pepper to taste
- Fresh parsley for garnish (optional)
- Extra sour cream or ranch for dipping (optional)
3. Step-by-Step Instructions to Prepare Cheesy Garlic Chicken Wraps
Preparation of Chicken
Start by seasoning the chicken breasts with paprika, Italian seasoning, salt, and pepper. Heat olive oil in a skillet over medium heat, then cook the chicken for about 6-8 minutes on each side until fully cooked. Remove from heat and let rest for a few minutes before slicing into thin strips.
Cooking the Garlic
In the same skillet, add minced garlic and sauté for about 30 seconds until fragrant. Be careful not to burn the garlic, as it can turn bitter.
Assembling the Wraps
Lay each tortilla flat and evenly distribute the sliced chicken over the center. Sprinkle the shredded cheese on top, then spoon the sautéed garlic over everything. For an extra cheesy experience, you can add more cheese before rolling.
Rolling the Wraps
Fold in the sides and roll tightly to form a wrap. You can secure with toothpicks if needed or toast the wrap in a skillet for a few minutes to seal and add some crispness.
Optional: Toast the Wraps
If you like your wraps crispy, place them in a hot skillet or use your Ninja Air Fryer Pro Crisp & Roast for a quick crunch. Just a minute or two on each side will do the trick!
4. Storage Tips for Leftover Cheesy Garlic Chicken Wraps
Store any leftover wraps in an airtight container in the refrigerator for up to 2 days. Reheat in a skillet or microwave until warm. Keep the wraps wrapped tightly to prevent the cheese from drying out.
5. Serving Suggestions for Cheesy Garlic Chicken Wraps
Serve these delicious wraps with a side of spicy cheesy garlic butter chicken linguine or a fresh green salad. They’re also fantastic with a side of crunchy veggie sticks or a flavorful dipping sauce like ranch or blue cheese dressing.
6. Enhance Your Cooking with Kitchen Tools
- Ninja SLUSHi Pro RapidChill Drink Maker: Perfect for preparing refreshing beverages to pair with your wraps.
- Fullstar Ultimate Veggie Prep Master: Makes chopping vegetables for salads or sides quick and easy.
- Crock-Pot Family-Size Slow Cooker: Ideal for cooking larger batches of chicken or making a slow-cooked sauce to add flavor.
Investing in high-quality equipment like these simple tools will greatly improve your cooking experience and result in perfect, restaurant-quality cheesy garlic chicken wraps.
7. Frequently Asked Questions
Can I use pre-cooked chicken for this recipe?
Yes, using pre-cooked chicken simplifies the process even further. Just slice or shred the cooked chicken and proceed with assembling the wraps. This is a great way to save time on busy days.
What cheese is best for cheesy garlic chicken wraps?
Cheddar or mozzarella cheese works beautifully due to their excellent meltability and flavor. Feel free to experiment with blends like Monterey Jack or pepper Jack for a spicy kick.
Are these wraps suitable for a gluten-free diet?
Use gluten-free tortillas instead of traditional flour wraps to make this recipe compatible with a gluten-free diet. Just be sure to check your ingredients for gluten content.
How long does it take to prepare and cook?
From start to finish, expect about 30 minutes — perfect for a quick meal or snack!
8. Conclusion
There’s no denying that cheesy garlic chicken wraps are a crowd-pleaser, combining savory flavors with gooey cheese and tender chicken. With simple ingredients and straightforward steps, you can enjoy this delightful dish anytime. Whether you serve them for lunch, dinner, or a party snack, these wraps will impress everyone at the table. So gather your ingredients, fire up your cooking tools, and indulge in this irresistible ooey-gooey chicken wraps today!
Print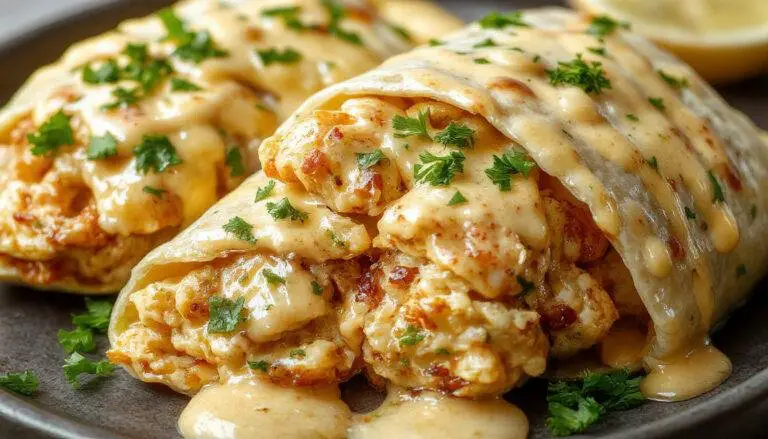
Cheesy Garlic Chicken Wraps: Ooey-Gooey Deliciousness!
Discover the delicious and easy Cheesy Garlic Chicken Wraps—ooey-gooey, flavorful, and perfect for quick meals or snacks. Juicy seasoned chicken, melted cheese, and aromatic garlic wrapped in soft tortillas make this recipe a favorite for all occasions. Enjoy crispy or soft wraps with optional dipping sauces and fresh garnishes for a satisfying experience.
- Total Time: 30 mins
- Yield: 4 wraps 1x
Ingredients
- 2 boneless, skinless chicken breasts
- 1 cup shredded cheddar or mozzarella cheese
- 4 large flour tortillas
- 3 cloves garlic, minced
- 2 tbsp olive oil
- 1 tsp paprika
- 1 tsp Italian seasoning
- Salt and pepper to taste
- Fresh parsley for garnish (optional)
- Extra sour cream or ranch for dipping (optional)
Instructions
- Season chicken breasts with paprika, Italian seasoning, salt, and pepper. Heat olive oil in a skillet over medium heat, then cook chicken for 6-8 minutes per side until fully cooked. Rest for a few minutes and slice into thin strips.
- In the same skillet, add minced garlic and sauté for about 30 seconds until fragrant, being careful not to burn.
- Lay each tortilla flat, place sliced chicken in the center, sprinkle shredded cheese, and spoon garlic over everything. Add more cheese if desired.
- Fold in the sides and roll tightly to form a wrap. Secure with toothpicks if needed or toast in a skillet for a crisp exterior.
- If crispy wraps are preferred, toast in a hot skillet or air fryer for 1-2 minutes per side for extra crunch.
Notes
- For an extra cheesy experience, add more cheese before rolling.
- To keep leftovers, store wraps in an airtight container in the refrigerator for up to 2 days and reheat in a skillet or microwave.
- For crispy wraps, toast in a skillet or air fryer until golden brown.
- Prep Time: 10 mins
- Cook Time: 20 mins
- Category: Main Dish
- Method: Stovetop, skillet, or air fryer
- Cuisine: American
- Diet: High-Protein, Kid-Friendly
Nutrition
- Serving Size: 1 wrap
- Calories: 420 Kcal
- Sugar: 3g
- Sodium: 720mg
- Fat: 22g
- Saturated Fat: 9g
- Unsaturated Fat: 12g
- Trans Fat: 0g
- Carbohydrates: 35g
- Fiber: 2g
- Protein: 30g
- Cholesterol: 90mg
1 thought on “Cheesy Garlic Chicken Wraps: Ooey-Gooey Deliciousness!”