🔥 Crispy Baked Chicken Legs – Golden, Juicy & Ready in Under 45 Minutes! 🔥
1. Introduction
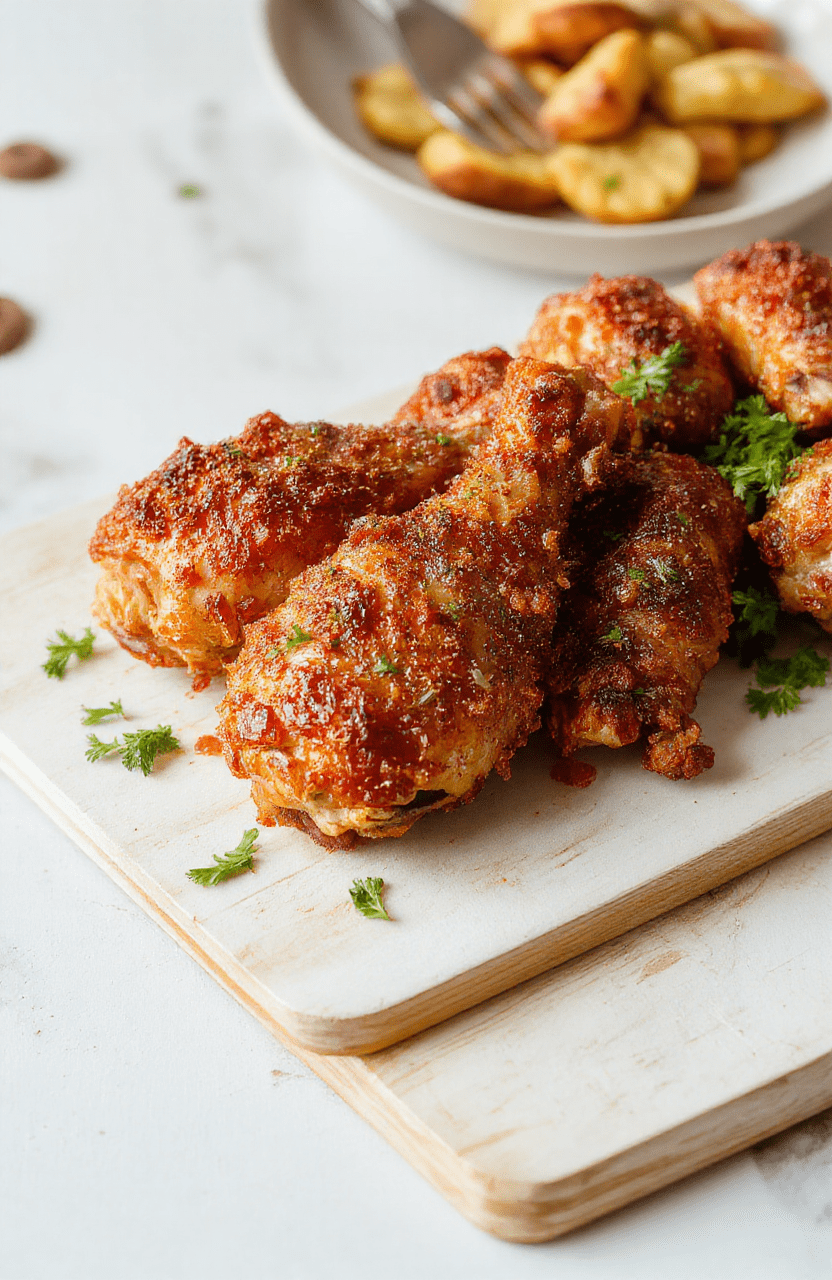
There’s something undeniably satisfying about crispy baked chicken legs — that shatteringly crunchy skin giving way to tender, succulent meat, all without deep-frying or a messy stovetop cleanup. This recipe delivers the exact same indulgent texture and rich flavor as your favorite fried version, but using oven-baked methods that are healthier, simpler, and ideal for meal prep or a relaxed weeknight dinner. I’ve tested this technique obsessively (really — think late nights, three versions in one evening) to perfect the balance of salt, acid, and heat for maximum crispness without drying out the meat. Whether you’re looking for quick dinner chicken legs or a more营养-forward option like healthy baked chicken thighs, this is your goto guide.
2. Why You’ll Love This Recipe
- Ready in 40 minutes — from prep to plate, perfect for busy weeknights without sacrificing flavor or texture.
- One-sheet pan dinner — minimal dishes, maximum impact. Just toss the chicken, pop it on a baking sheet, and walk away.
- High-protein & gluten-free — naturally nutrient-dense, easy to adapt for paleo, keto, or whole30 diets.
- Meal-prep friendly — leftovers reheat beautifully and pair well with grains, roasted veggies, or even over salad.
- Use pantry staples — no fancy or hard-to-find ingredients needed. Just simple, bold seasoning for standout results.
3. Ingredient Notes
Don’t skip the details — this is where most home cooks go wrong. Let me walk you through why each ingredient matters:
- Chicken legs (drumsticks & thighs) with skin-on & bone-in — skin-on is non-negotiable for crispiness. Bone-in adds flavor and keeps the meat moist during roasting. Aim for 6–8 oz pieces for even cooking.
- High-heat oil (avocado or refined coconut) — unlike olive oil, these won’t smoke at 425°F+ and help conduct heat to crisp the skin. I avoid Canola due to its milder flavor profile.
- Kosher salt & freshly cracked black pepper — salt not only seasons but draws out moisture initially, which then reabsorbs and helps create a drier surface for better browning.
- Garlic powder & smoked paprika — garlic contributes umami depth without the burn risk of fresh garlic, while smoked paprika adds subtle charred-sweet complexity (no charcoal needed!).
- Baking powder (not baking soda!) — YES, we use a *tiny* pinch. It slightly raises the skin’s pH, accelerating Maillard browning and creating that coveted crackle. Use aluminum-free for best taste.
4. Kitchen Tools You Need
Having the right tools makes all the difference — especially when crispiness is the mission. Here’s what I use in my own kitchen to pull off crispy baked chicken legs like a pro:
- Ninja Air Fryer Pro Crisp & Roast 4-in-1 — an absolute game-changer for faster, more even crispiness. Set it to 400°F for 12 minutes (shake halfway), and you’ll get airline-level crunch in half the time.
- T-fal 14-Piece Hard Anodized Nonstick Cookware Set — great value for durable, warp-resistant pans. The shallow roasting pan included is perfect for sheet-pan dinners with veggies.
- Compact 6-in-1 Digital Air Fryer by Amazon Basics — if you’re short on counter space or want a budget-friendly crisp solution, this is surprisingly powerful for small batches.
- Deluxe 33-Piece Silicone Utensil Set — heat-safe, non-scratch tools are essential for handling hot chicken without scratching nonstick surfaces.
- JoyJolt Airtight Glass Food Storage Set — keeping leftover chicken legs fresh is easy — and you’ll love how clear they are for meal tracking or quick grab-and-go lunches.
5. How to Make Crispy Baked Chicken Legs
Phase 1: Prep & Dry — The Secret to Crisp
Start by patting the chicken legs completely dry with paper towels — this step alone can make or break your crispiness. Once dry, place them skin-side up on a wire rack set over a baking sheet (elevating them allows hot air to circulate under the skin for even browning). Season generously with salt and pepper. Whisk together the remaining spices, baking powder, and oil to form a paste, then rub it evenly over the skin and sides. Let sit uncovered in the fridge for at least 30 minutes (or up to 24 hours) — this dries the skin even more and seasons it from within.
Phase 2: Roast — Low & Slow Then Blast-High
Preheat your oven to 400°F (200°C). Roast the chicken legs on the middle rack for 25 minutes. Then, switch your oven to Broil (High) and broil for 4–7 minutes, watching closely — you want the skin golden and blistered, not burnt. Look for visual cues: the skin should look bubbly, slightly darkened at the edges, and pull away smoothly from the meat when tugged with a fork.
Phase 3: Rest & Serve
Let the chicken legs rest for 5–7 minutes before serving — this lets juices redistribute so every bite stays juicy. Serve with a squeeze of fresh lemon, chopped parsley, and a side like our High-Protein Honey BBQ Chicken Mac & Cheese for comfort food perfection, or alongside Katsu-style bowls for a spicy, tangy twist.
6. Expert Tips for Success
- Temperature matters — an oven that’s 25°F off can cause sogginess or burning. Use an oven thermometer (I keep one taped to the oven rack).
- Use a meat thermometer — the safe internal temp for chicken is 165°F, but pull at 160°F — carryover heat will bring it to safe levels without drying out the meat.
- No overcrowding — space legs at least 1 inch apart. Crowding steams the skin, killing crispness.
- Flip halfway for double-crisp — optional, but flipping halfway through roasting yields even golden color on both sides (great for presentation).
- Use baking powder, not baking soda — baking soda is too alkaline and leaves a soapy taste; baking powder provides gentle lift without off-notes.
7. Variations & Substitutions
- Spicy Kick — add 1 tsp cayenne or 2 tbsp harissa paste to the seasoning blend.
- Sweet & Smoky — stir 1 tbsp brown sugar or maple syrup into the oil-spice mixture (reduce salt slightly).
- Herb-Crusted — mix in 2 tbsp dried thyme or rosemary with the spices for an earthy, aromatic crust.
- Sheet-Pan Dinner — toss broccoli, carrots, or potatoes in the same oil-spice blend and roast alongside the chicken for a full meal.
- Gluten-Free / Paleo / Whole30 — this recipe is naturally all of the above, as long as your seasoning blend has no hidden additives (check labels!).
8. Storage & Reheating
Cool leftover chicken legs completely and store in JoyJolt airtight glass containers for up to 4 days. To reheat:
- Oven (best for crisp retention) — 375°F for 12–15 minutes (place on a wire rack).
- Air Fryer (quickest) — 350°F for 4–6 minutes, shake once.
- DO NOT microwave — it turns skin rubbery. If you must, microwave *just* until heated through, then finish in air fryer for 2 minutes.
9. FAQ
Can you use chicken thighs instead of legs?
Absolutely! But bone-in, skin-on thighs cook faster — reduce roasting time to 20 minutes, then broil 3–5 minutes. Watch closely as they’re leaner than drumsticks.
Why isn’t my skin crispy?
The top 3 causes: 1) Skin wasn’t dry before seasoning, 2) Oven wasn’t hot enough, 3) Skipped the broil finish. Bonus: Baking powder must be fresh — test it with a splash of vinegar before use.
Can I make this ahead?
Yes! Dry-brine the chicken (salt only) up to 24 hours ahead, then refrigerate uncovered. When ready, rinse, pat dry, and proceed with the recipe.
What’s the best side for crispy baked chicken legs?
I love them with roasted sweet potatoes and a tangy slaw, but they’re fantastic with our Easy Comforting Bread Pudding — yes, sweet & savory magic!
10. Conclusion
There you have it — crispy baked chicken legs that deliver on texture, flavor, and convenience. With a few smart techniques (plus a trustworthy oven or air fryer), you’ll never go back to takeout after tasting this golden, juicy perfection. Make it, share it, reheat it — and don’t forget to snap a photo of that irresistible skin before it vanishes! 🍗✨
Print
Crispy Baked Chicken Legs
These crispy baked chicken legs are a foolproof weeknight dinner: juicy, flavorful, and packed with protein. No frying required — just simple seasonings, high heat, and 35 minutes in the oven for golden, crackling skin and tender meat.
- Total Time: 45 minutes
- Yield: 4 servings 1x
Ingredients
- 4 bone-in, skin-on chicken thighs (about 2 lbs)
- 2 tbsp olive oil
- 1 tsp garlic powder
- 1 tsp paprika
- 1 tsp dried thyme
- 1 tsp salt
- ½ tsp black pepper
- ½ tsp onion powder
- 1 lemon, sliced
- Fresh rosemary sprigs (optional for garnish)
Instructions
- Preheat oven to 425°F (220°C). Line a baking sheet with parchment paper or foil for easy cleanup.
- In a small bowl, mix together olive oil, garlic powder, paprika, thyme, salt, pepper, and onion powder.
- Pat chicken thighs dry with paper towels — this ensures maximum crispiness. Rub the seasoning mixture evenly over the chicken, massaging it under the skin where possible.
- Place chicken thighs on the prepared baking sheet, skin-side up. Add lemon slices and rosemary sprigs nearby (not touching the meat).
- Bake for 35–40 minutes, or until the internal temperature reaches 165°F (74°C) and the skin is deep golden and crispy.
- Let rest 5 minutes before serving. Garnish with extra herbs if desired.
Notes
- For extra-crispy skin, broil on high for 2–3 minutes at the end — watch closely to avoid burning.
- Pair with roasted potatoes, green beans, or a simple salad for a complete meal.
- Meal prep tip: Cook in advance and reheat in a 350°F oven for 10–12 minutes to restore crispiness.
- Prep Time: 10 minutes
- Cook Time: 35 minutes
- Method: Baking
- Cuisine: American
- Diet: High Protein
Nutrition
- Serving Size: 1 chicken thigh (with bone)
- Calories: 285 Kcal
- Sugar: 0g
- Sodium: 412mg
- Fat: 20g
- Saturated Fat: 5g
- Unsaturated Fat: 13g
- Trans Fat: 0g
- Carbohydrates: 1g
- Fiber: 0g
- Protein: 23g
- Cholesterol: 95mg