golden, cracking-crisp Homemade Crispy Chicken Tenders + a Tangy Dipping Sauce That Steals the Show 🍗✨
1. Introduction
There’s something undeniably comforting about Homemade Crispy Chicken Tenders — that satisfying crack as you bite into a perfectly golden coating, giving way to juicy, tender肉 inside. This isn’t just any fry-party staple; it’s where nostalgia meets restaurant-quality excellence. inspired by classics like the Chick-fil-A copycat recipe, but with a homemade twist that’s lighter, crispier, and utterly addictive.
I’ve tested this tender method across air fryers, deep fryers, and ovens to perfect the balance of crunch and tenderness. What sets this apart is the double-dredge technique and buttermilk brine — no shortcuts here. And when paired with a zesty, homemade tangy dipping sauce (think: a creamy-honey-sriracha blend), it’s pure dinner-table magic.
Ready in under 30 minutes, this recipe is ideal for busy weeknights, game-day snacking, or even packing kid-friendly lunches. Plus, it’s easily adaptable for dietary preferences — we’ll get to those in a bit.
2. Why You’ll Love This Recipe
- Ready in 25–30 minutes — faster than takeout and healthier, too.
- No fancy equipment required — works in an air fryer, skillet, or oven.
- One-pan or one-bowl cleanup (minus the dipping sauce — worth every extra dish).
- Baby-friendly & crowd-pleasing — kids adore the crunch, adults love the flavor.
- Make-ahead friendly — breaded tenders freeze beautifully for future fast meals.
3. Ingredient Notes
Great chicken tenders start long before the oil heats — it begins in the marinating and dredging stages. Here’s how to get it right:
Chicken Tenders
Use fresh, skinless chicken tenders (not strips cut from breasts) — they’re naturally uniform and cook evenly. If you can find organic or free-range, even better for flavor and texture. Thickness matters: aim for ¾-inch thick strips. If your tenders are uneven, slice thicker ones horizontally so they cook at the same rate.
Buttermilk Brine (Non-Negotiable!) 🥛
Buttermilk does more than tenderize — its acidity breaks down proteins for a juicier bite and helps the coating adhere like glue. Don’t skip the 30-minute minimum brine. For extra depth, add 1 tsp smoked paprika and ½ tsp garlic powder to the buttermilk.
Crispy Coating
This is where the magic happens. We use a double-dredge: first, a flour mixture seasoned with onion powder, cayenne, and a pinch of MSG (yes, MSG — it amplifies umami without tasting “silly”). Then a final dusting of rice flour — yes, rice flour! It’s the secret to achievingThat ultra-crisp, shatter-worthy shell that doesn’t soften quickly.
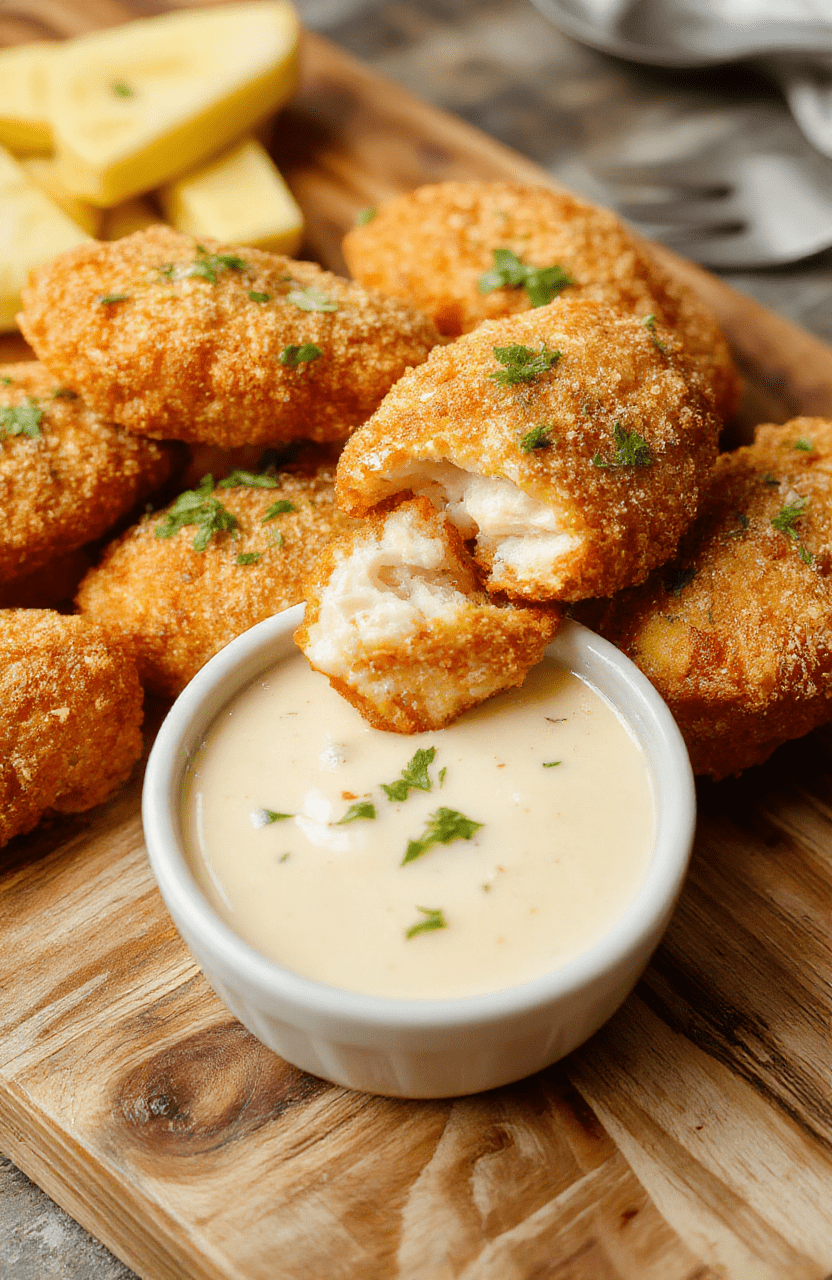
Tangy Dipping Sauce
A blend of mayo, lemon juice, Dijon mustard, honey, and sriracha creates a creamy, zesty, slightly spicy dip. Use full-fat mayo — low-fat versions separate when chilled. Freshly squeezed lemon juice is key: bottled can taste flat. Want it chunky? Add 1 tbsp finely chopped dill pickles.
4. Kitchen Tools You Need
A few smart tools can make or break texture and consistency. My go-to kits for this recipe — all tested repeatedly — are listed below (affiliate links included):
For air fryers, the Ninja Air Fryer Pro Crisp & Roast 4-in-1 is unbeatable — its powerful fan and even heat distribution produce uniformly golden chicken without hot spots. The “Crisp” setting locks in moisture while maximizing crunch.
If you prefer stovetop frying, the T-fal 14-Piece Hard Anodized Nonstick Cookware Set is a long-term winner — it heats evenly, resists warping, and releases chicken cleanly (no sticking nightmares!).
For a sleek, compact solution that doubles as a grill and smoker, check out the Ninja FlexFlame 5-in-1 Outdoor Grill & Smoker — perfect for summer cookouts where you want smoke flavor without a charcoal mess.
And for post-meal organization, nothing比 the Fullstar Ultimate Veggie Prep Master — it has a built-in grater, slicer, and shredder, making prep for sauces or sides (like coleslaw!) instant.
5. How to Make Homemade Crispy Chicken Tenders
I’ll walk you through it step-by-step — think of it like a culinary recipe with science-backed timing and visual cues.
Phase 1: Brining (30 min – 2 hours)
In a shallow dish, whisk 1 cup buttermilk, 1 tsp onion powder, ½ tsp smoked paprika, ¼ tsp cayenne, and salt. Pat chicken dry with paper towels, then submerge completely. Cover and refrigerate for at least 30 minutes (or up to 2 hours — don’t go longer, or the texture turns mushy).
Phase 2: Dredging Station Setup
In Bowl 1 — ¾ cup all-purpose flour, 2 tsp cornstarch (for extra crisp), 1 tsp salt, ½ tsp black pepper, ½ tsp garlic powder, ½ tsp onion powder, ¼ tsp cayenne, and a pinch of MSG (optional but recommended).
In Bowl 2 — ½ cup rice flour (critical for the outer “armor” layer).
Remove chicken from buttermilk — let excess drip off for 10 seconds. Do not shake or wipe. First, coat in Bowl 1 (flour mixture), pressing firmly to embed. Then dip back in buttermilk briefly, then double-dredge in Bowl 2 (rice flour). Place on a wire rack while preheating your cookware — this rest step lets the coating set.
Phase 3: Cooking
Air Fryer Method (Recommended):
Preheat air fryer to 400°F (200°C) for 5 minutes. Lightly spray basket with oil. Arrange tenders in a single layer — no overlap. Spray tops lightly with avocado or olive oil spray. Air fry for 8 minutes, flip, spray again, and cook 6–8 more minutes until internal temp hits 165°F and coating is deep golden. Rest 3 minutes before serving.
Skillet Method:
Heat ¼-inch vegetable or peanut oil in a cast iron or nonstick skillet over medium-high heat (360°F – use a thermometer!). Fry 2–3 tenders at a time for 2–3 minutes per side. Drain on a wire rack over a baking sheet (not paper towels — they trap steam and soften the crust).
6. Expert Tips for Success
You’ll face three common pitfalls with crispy chicken — here’s how to dodge them:
- Crispy coating turns soggy? → Always rest cooked tenders on a wire rack, not a plate. Trapped steam softens crust instantly.
- Coating falls off? → Ensure each piece is cold (not room temp) before cooking. A refrigerated 10-minute rest after dredging = better adhesion.
- Uneven browning? → Oil or air temp must be consistent. For air fryers, shake basket halfway through — but only after flipping to avoid dislodging coating.
Pro chef secret: Add 1 tbsp baking powder to your flour mix — it boosts browning and lift without altering flavor.
7. Variations & Substitutions
- Gluten-Free → Swap all-purpose flour for 1:1 GF blend (Bob’s Red Mill works best). Ensure buttermilk is GF-certified if needed.
- Dairy-Free → Use plain almond or oat milk + 1 tbsp lemon juice as “buttermilk.” Skip the egg wash (if you add it) or use flax gel.
- Spicier Version → Add ½ tsp chipotle powder to the brine + 1 tsp crushed red pepper to the flour.
- Herb-Crusted → Mix 2 tbsp chopped parsley, dill, or chives into the final rice flour coat.
- Baked Option → Bake at 425°F for 15 min, flip, spray, bake 8–10 more minutes. Less crispy than air-fry, but healthier.
8. Storage & Reheating
Store cooled chicken tenders in an airtight glass container for up to 4 days. Do not freeze with sauce — it changes texture.
To Reheat (for maximum crisp):
✅ Air Fryer (best): 375°F for 4–5 minutes. No thawing needed — directly from fridge.
✅ Skillet: Medium-low heat, 3–4 min per side with a splash of oil.
❌ Microwave: Only as a last resort — it turns crust rubbery. Use a paper towel, and eat immediately.
For meal prep, freeze uncooked breaded tenders on a tray until solid, then store in a freezer bag. Fry from frozen — add 2–3 minutes to cooking time.
9. FAQ
Can I use chicken breasts instead of tenders?
Absolutely! Cut into thick strips (¾-inch), and pound slightly for even thickness. Cooking time stays the same — just watch for overcooking on larger pieces.
Why does my chicken tenders taste bland?
Salt is non-negotiable in both the brine and flour. Don’t undersalt. Also, cold chicken straight from the fridge absorbs less seasoning — bring to room temp for 10 minutes *after* brining before dredging.
What’s the best oil for frying?
High-heat oils like peanut, avocado, or rice bran oil have smoke points above 400°F. Canola works in a pinch, but avoid olive oil (low smoke point, strong flavor).
Can I make the tangy sauce days ahead?
Yes! It tastes better after 24 hours as flavors meld. Store up to 1 week in fridge in a sealed jar.
10. Conclusion
Homemade crispy chicken tenders shouldn’t be a rare — it should be routine. With this recipe, you’ve got restaurant-level crunch, juicy chicken, and a customizable sauce that’ll make you question why you ever ordered takeout. And if you’re craving another crowd-pleaser next, our Sweet & Spicy Honey Pepper Chicken or Buffalo Chicken Sliders pair perfectly.
Tag a friend who needs this tenders fix — or better yet, make a double batch and freeze half. Life’s too short for soggy chicken. 😋
Print
Homemade Crispy Chicken Tenders with Tangy Dipping Sauce
Crispy, golden-brown chicken tenders with a secret brine and double-dredge technique formaximum crunch, paired with a homemade tangy dipping sauce.
- Total Time: 30 minutes
- Yield: 4 servings 1x
Ingredients
- 1 lb boneless, skinless chicken breast tenders
- 2 cups buttermilk
- 1 tsp salt
- 1 tsp black pepper
- 1 tsp paprika
- 1/2 tsp garlic powder
- 1/2 tsp onion powder
- 1 cup all-purpose flour
- 1/2 cup cornstarch
- 1/2 tsp baking powder
- 1/2 tsp cayenne pepper (optional)
- 2 eggs, beaten
- Vegetable oil for frying
- For sauce: 1/4 cup mayonnaise, 1 tbsp lemon juice, 1 tsp sweet relish, 1/2 tsp Dijon mustard, pinch of garlic powder
Instructions
- Brine chicken tenders in buttermilk with salt, pepper, paprika, garlic powder, and onion powder for at least 30 minutes (or up to 4 hours).
- In a shallow bowl, whisk together flour, cornstarch, baking powder, cayenne, and 1 tsp salt.
- In a separate bowl, beat the eggs.
- Dredge each tender in the flour mixture, dip in egg, then dredge again in flour mixture—press firmly to create a thick, flaky coating.
- Heat oil to 350°F (175°C) in a deep skillet or pot.
- Fry tenders 3–4 at a time for 2–3 minutes per side until golden and internal temp reaches 165°F (74°C).
- Drain on wire rack or paper towels.
- Stir together sauce ingredients and serve alongside tenders.
Notes
- For extra crispiness, double-dredge by repeating the flour–egg–flour step.
- Don’t crowd the pan—fry in batches to maintain oil temperature.
- Air-fryer option: 400°F for 10–12 min, flipping halfway.
- Store leftovers in fridge up to 3 days; reheat in air fryer for best texture.
- Prep Time: 15 minutes
- Cook Time: 15 minutes
- Method: Deep Frying
- Cuisine: American
- Diet: High Protein
Nutrition
- Serving Size: 2 tenders + 1 tbsp sauce
- Calories: 380 Kcal
- Sugar: 2g
- Sodium: 620mg
- Fat: 19g
- Saturated Fat: 4g
- Unsaturated Fat: 12g
- Trans Fat: 0g
- Carbohydrates: 30g
- Fiber: 1g
- Protein: 32g
- Cholesterol: 95mg