
🍗 Sticky Brown Sugar Garlic Chicken: A Flavor Explosion in Every Bite! 🍯
1. Introduction
Imagine pulling a glistening, caramelized sheet pan from the oven—its aroma filling your kitchen with the perfect blend of sticky brown sugar garlic chicken magic. This isn’t just dinner; it’s a fast-track ticket to comfort with a modern, crave-worthy twist. Rich, sticky glaze clings to tender chicken thighs, punctuated by garlicky depth and a hint of acidity to balance the sweetness. Whether you’re rushing home after work or planning a cozy family meal, this one-pan garlic chicken delivers elegant ease without sacrificing flavor. Ready in under 35 minutes and forgiving enough for beginner cooks (but impressive enough for seasoned foodies), it’s no surprise this sweet and savory chicken has become a staple across millions of home kitchens.
2. Why You’ll Love This Recipe
- ✅ Ready in under 35 minutes—perfect for busy weeknights
- ✅ One-pan cleanup — minimal dishes, maximum flavor
- ✅ Balanced sweet & savory — sticky, garlicky, slightly tangy
- ✅ Uses pantry staples — no hard-to-find ingredients
- ✅ Family-friendly & crowd-pleasing — even picky eaters ask for seconds
3. Ingredient Notes
Quality makes all the difference—even in simple recipes. Here’s why I carefully curate each ingredient:
- Brown sugar — I always use dark brown sugar for its molasses-rich depth. Light brown works in a pinch, but dark adds that extra “wow” complexity.
- Fresh garlic — freshly minced garlic is non-negotiable. Bottled garlic lacks the pungent, aromatic punch that caramelizes beautifully in the glaze.
- Soy sauce — prefer low-sodium to control saltiness, but tamari (gluten-free) or coconut aminos work great for dietary needs.
- Fresh ginger — grated ginger brightens the sauce and cuts through the richness. Skip the powdered version here—it won’t give the same zing.
- Chicken thighs — boneless, skinless thighs stay juicy even if slightly overcooked. Trust me, breast meat dries out far too easily in this application.
- Balsamic vinegar — adds tang and helps the glaze cling beautifully. Don’t substitute with apple cider vinegar—it changes the flavor profile too much.
Feeling adventurous? Add a pinch of red pepper flakes for heat or a splash of pineapple juice for tropical flair.
4. Kitchen Tools You Need
Cooking should be joyful—and the right tools make all the difference. Here’s what I swear by when making sticky brown sugar garlic chicken:
- For a quick, hands-off option, consider the Compact 6-in-1 Digital Air Fryer by Amazon Basics—it gives you ultra-crispy edges without constant monitoring.
Tip: finish under the broiler if you don’t have an air fryer! - A sturdy, nonstick pan ensures even browning and effortless cleanup. The T-fal 14-Piece Hard Anodized Nonstick Cookware Set is a favorite for its durable, PFOA-free coating and oven-safe construction.
- If you love versatility, upgrade to the Ninja Foodi Smart XL Indoor Grill & Air Fryer Combo — it gives you that beautiful sear *and* air-fry crispiness, all in one appliance.
- For prepping garlic and ginger quickly, the Fullstar Ultimate Veggie Prep Master slices, peels, and minces with precision—no more tearing up over the cutting board!
- And if you often meal-prep or store leftovers, the JoyJolt Airtight Glass Food Storage Set keeps flavors fresh and fridge organization painless.
All these tools help bring the meal together smoothly—even on chaotic weeknights.
5. How to Make Sticky Brown Sugar Garlic Chicken
The secret to perfect sticky brown sugar garlic chicken lies in layering flavors and watching for key visual cues. Let’s break it down into 3 easy phases:
Phase 1: Marinate & Pre-Sear (10 minutes)
In a large bowl, whisk together 3 tbsp brown sugar, 4 minced garlic cloves, 1 tbsp fresh grated ginger, 2 tbsp soy sauce, 1 tbsp balsamic vinegar, and 1 tbsp olive oil. Toss in 1.5 lbs boneless, skinless chicken thighs (cut into bite-sized pieces). Let sit for 10 minutes while you preheat your oven to 400°F (200°C).
In a large oven-safe skillet (or baking dish), heat 1 tbsp oil over medium-high heat. Add chicken—and don’t disturb it for 3–4 minutes. You’re looking for a deep golden sear on each piece. This builds flavor foundation.
Phase 2: Glaze & Bake (15 minutes)
Pour any remaining marinade over the chicken in the pan. Transfer to the oven and bake for 12–15 minutes. Watch closely after 10 minutes—the sauce will bubble and thicken. When it starts to caramelize and stick to the pan, you’re on track.
Visual cue: the sauce should coat the back of a spoon thickly—if it’s too runny, return to the stove for 1–2 minutes to reduce.
Phase 3: Finish & Serve (3 minutes)
Garnish with sesame seeds and sliced green onions. Pair with steamed rice, roasted veggies, or even noodles. The chicken should pull apart easily, with a glossy, sticky coating that glistens beautifully under light.
6. Expert Tips for Success
- Don’t skip the sear—browning builds the Maillard reaction, which gives depth unmatched by boiling or steaming.
- Reserve a spoonful of marinade to finish the dish if the glaze looks dull. Stir it back in with a tiny bit of butter for extra sheen.
- Use thighs, not breasts—chicken breast dries out quickly at high heat. Thighs stay succulent, even if slightly overcooked.
- Spread chicken in a single layer—crowding causes steaming, not caramelizing. Use two pans if needed.
- Finish under the broiler for 1–2 minutes if you love extra-crispy edges (watch closely!)
7. Variations & Substitutions
- Veggie Add-In: Toss in bell peppers, broccoli florets, or snap peas with 10 minutes left. They steam in the glaze—no extra oil needed.
- Spicy Version: Add 1 tsp sriracha or ½ tsp cayenne to the marinade.
- Gluten-Free: Use tamari instead of soy sauce.
- Low-Sugar: Replace brown sugar with monk fruit brown sugar blend (1:1) and add 1 tbsp apple juice for moisture.
- Instant Pot Option: Sauté chicken, then pressure cook 4 minutes with marinade. Natural release 5 minutes before glazing under broiler.
8. Storage & Reheating
- Fridge: Store in airtight container for up to 4 days.
- Frozen: Freeze up to 3 months—best thawed overnight in fridge before reheating.
- Reheat: Warm in a skillet over medium-low until heated through, or microwave in 30-second bursts, stirring in between. For best texture, finish under the broiler or air fryer for 2–3 minutes to revive crispiness.
- Make-Ahead Tip: Marinate chicken (uncooked) up to 24 hours ahead—but don’t cook until ready to serve. The acid in the marinade can toughen meat if over-marinated.
9. FAQ
1. Can I use chicken breast instead of thighs?
Yes—but cook just 10–12 minutes to avoid dryness, and consider braising the last 5 minutes with a splash of broth for moisture.
2. Why is my sauce too thin?
The sauce thickens as it cools, but if it’s still runny, simmer it on the stovetop for 2–3 minutes or add a slurry of 1 tsp cornstarch + 1 tbsp water.
3. What can I serve with this?
Classic pairings: jasmine rice, garlic butter noodles, or cauliflower rice. Try it alongside our Moist Chocolate Banana Bread for a sweet/savory combo twist—or for more main dish ideas, check Dump-and-Go Smothered Pork Chops or Sweet & Spicy Honey Pepper Chicken.
4. Is this kid-friendly?
Absolutely! Skip the garlic if serving very young kids—or use roasted garlic (sweet and mellow). You’ll be shocked how many children love this sticky, tender chicken. (See our Game Day Sliders for more family favorites!)
10. Conclusion
This sticky brown sugar garlic chicken is more than just dinner—it’s a confidence boost for any home cook. Easy, flavorful, and endlessly adaptable, it proves that weeknight meals don’t have to be boring or time-consuming. With just 10 minutes of prep and one pan, you’ll deliver restaurant-worthy results your whole family will ask for again and again. So preheat that oven, grab your favorite skillet, and get ready for that *sticky* applause!
And if you love it, be sure to pair it with one of these crowd-pleasers: Super Bowl Party Appetizers, or save this recipe for later using our Clever Fox DIY Family Recipe Journal. Happy cooking!
Print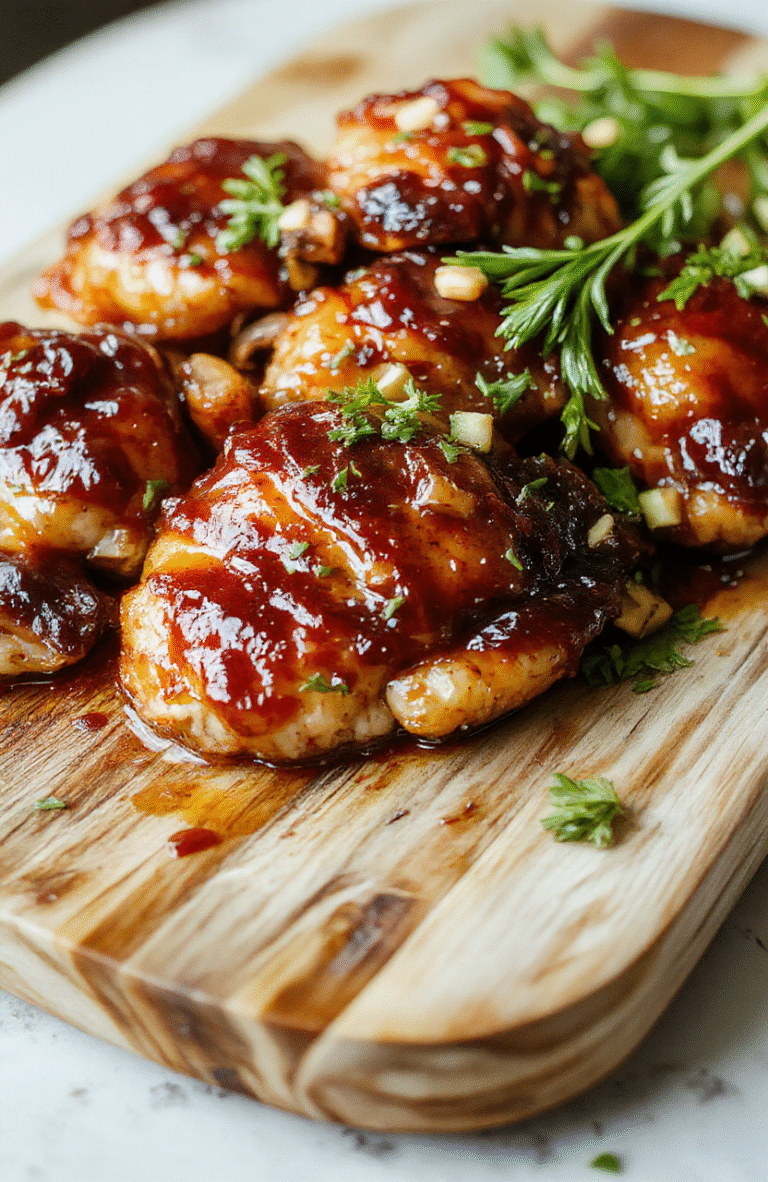
Sticky Brown Sugar Garlic Chicken
This sticky brown sugar garlic chicken is tender, flavorful, and ready in 25 minutes. Perfect for a quick weeknight dinner with minimal cleanup.
- Total Time: 25 minutes
- Yield: 4 servings 1x
Ingredients
- 1.5 lbs boneless, skinless chicken thighs
- 3 tbsp olive oil
- 4 cloves garlic, minced
- 1/4 cup brown sugar
- 2 tbsp soy sauce
- 1 tbsp rice vinegar
- 1 tsp sesame oil
- 1/2 tsp red pepper flakes (optional)
- Sesame seeds and sliced scallions for garnish
Instructions
- Pat chicken dry and season with salt and pepper.
- Heat olive oil in a large skillet over medium-high heat. Cook chicken until golden brown, about 4–5 minutes per side. Remove and set aside.
- In the same pan, sauté garlic for 30 seconds until fragrant.
- Add brown sugar, soy sauce, rice vinegar, sesame oil, and red pepper flakes. Stir until sugar dissolves and glaze thickens, about 2 minutes.
- Return chicken to pan and coat generously with glaze. Simmer 3–4 minutes until chicken is cooked through and sauce is glossy and sticky.
- Garnish with sesame seeds and scallions. Serve over rice.
Notes
- For extra tenderness, marinate chicken in the glaze (minus cooking oil) for 30 minutes before cooking.
- Use thighs instead of breasts for juicier results—breasts can dry out easily.
- Garnish just before serving to keep scallions vibrant.
- Prep Time: 10 minutes
- Cook Time: 15 minutes
- Method: Pan-seared
- Cuisine: Asian-inspired
- Diet: None specified
Nutrition
- Serving Size: 1/4 recipe
- Calories: 320 Kcal
- Sugar: 12g
- Sodium: 520mg
- Fat: 14g
- Saturated Fat: 3g
- Unsaturated Fat: 9g
- Trans Fat: 0g
- Carbohydrates: 18g
- Fiber: 1g
- Protein: 31g
- Cholesterol: 95mg